Loading... <div class="tip share">请注意,本文编写于 1107 天前,最后修改于 1107 天前,其中某些信息可能已经过时。</div> 开始之前,先劝大家:All in one, All in BOOM 一开始的计划是:ESXi当底层,虚拟机OpenWRT主路由挂个科学上网,简单弄一下 # 本教程中涉及的环境 ESXi 7.0 Update 3 iKuai8_3.6.5 Build 202206011520 由[eSir Playground](https://www.youtube.com/c/eSirPlayGround)构建的OpenWRT GDQ Spring[2022]-x86_64-generic-squashfs-uefi(我不建议用Spring版本,用Winter!!!Spring版本我都翻车好几次了草) # 实操开始 ## 第一次尝试 ### 准备工作 然后就开始嗯造,装ESXi一切都很顺利,然后就是开OpenWRT虚拟机,我用的是eSir Playground的GDQ构建,因为镜像是 `.img` 格式的,要被ESXi所使用,必须要进行转换,我用的工具:[starwindconverter下载链接](https://www.starwindsoftware.com/tmplink/starwindconverter.exe)。 下载安装过程可以直接一路下一步,完全没有什么问题,安装好以后打开 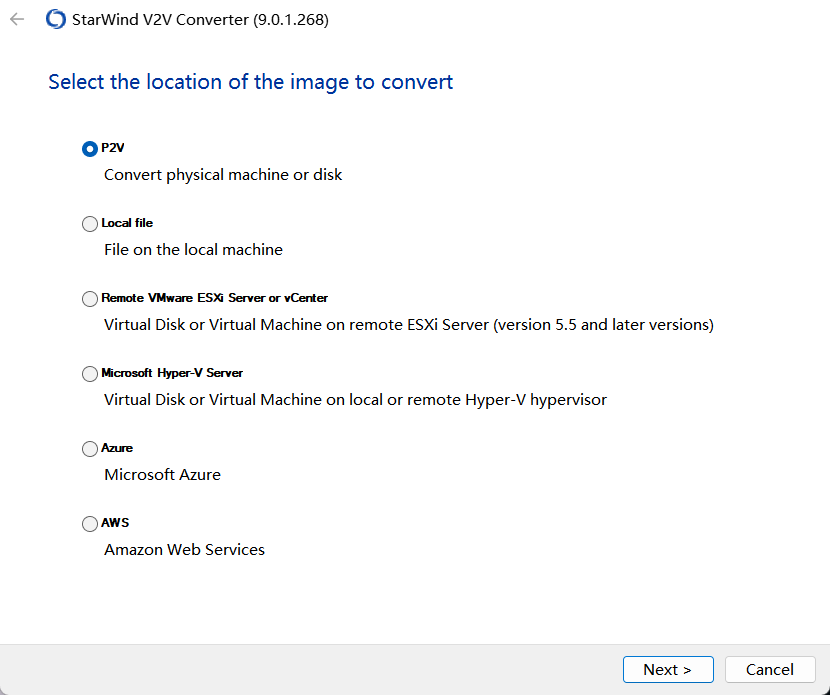 这个时候我们需要选择 **Local File**,在这个界面选择你的镜像: 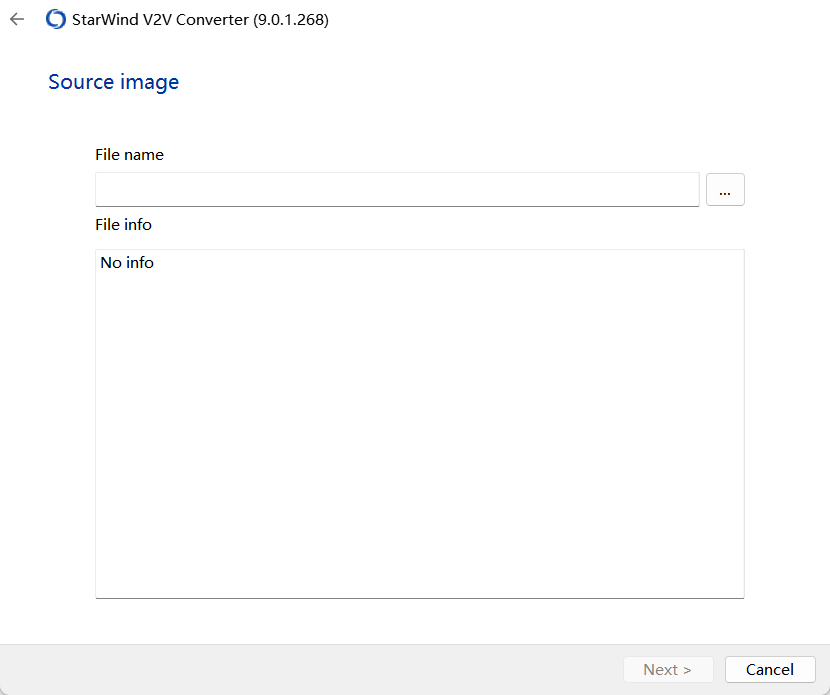 然后我们点击“Next”,下一步我们仍然选择 **Local File** 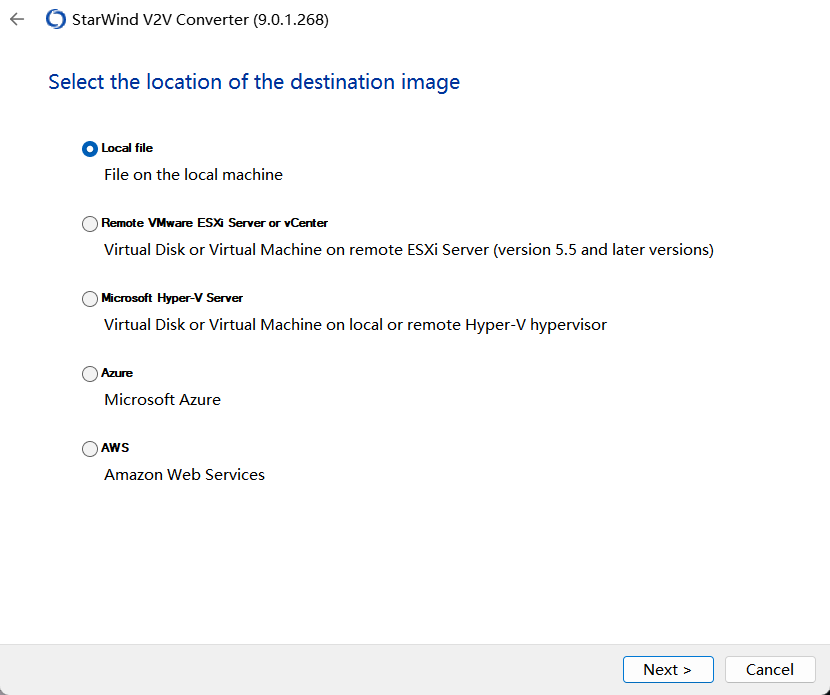 下一步,选择要转换的磁盘类型,我们选择 **VMDK**: 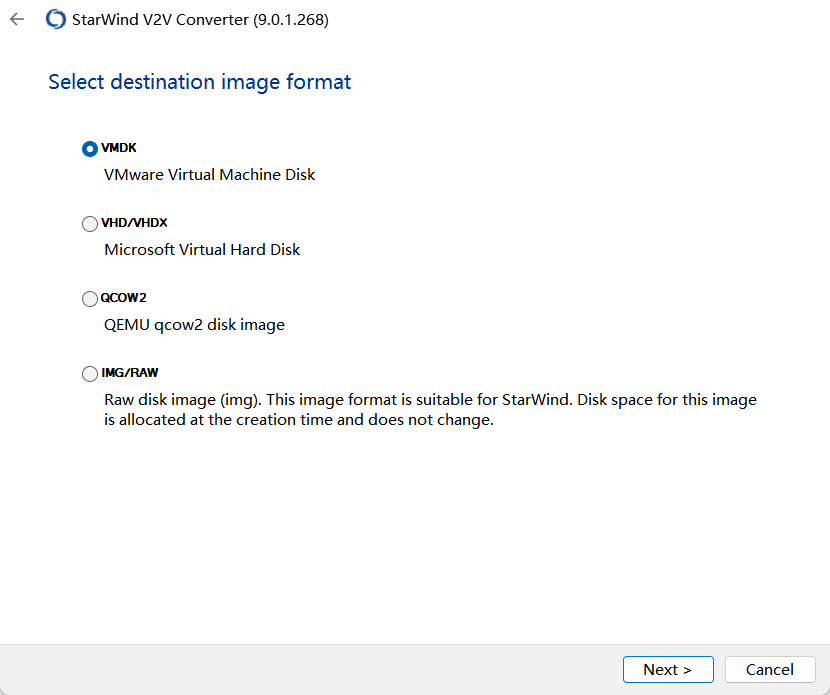 这一步 **非常关键!!!** 必须选择 **ESXi Server image** 如果选错了就会脑抽,ESXi将 **不能** 识别你的镜像 ~~(问就是我翻车过)~~ 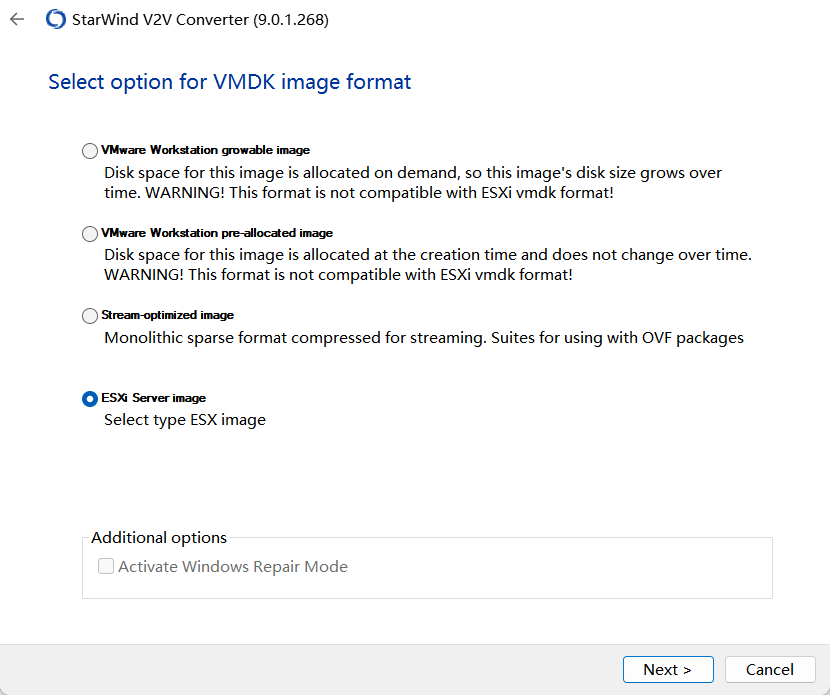 下一步我们选择 **ESXi growable image** 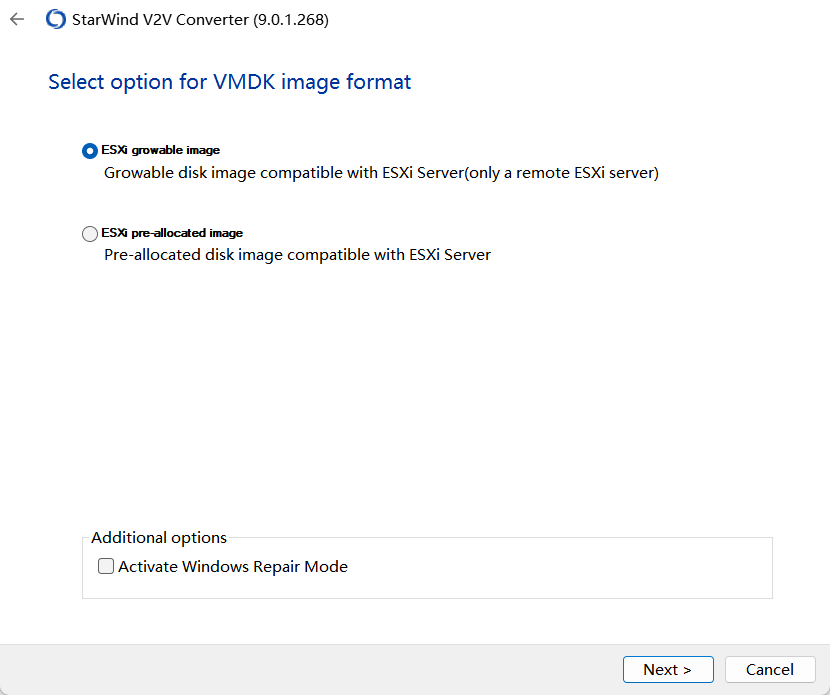 最后选择导出位置,导出镜像文件即可(转换应该是很快的),完成后你就可以退出该工具,打开刚刚的文件夹,你会看到两个文件,请注意,这不是bug,这两个 **都要** 上传到ESXi,它俩上传完以后会很神奇地“合成”: 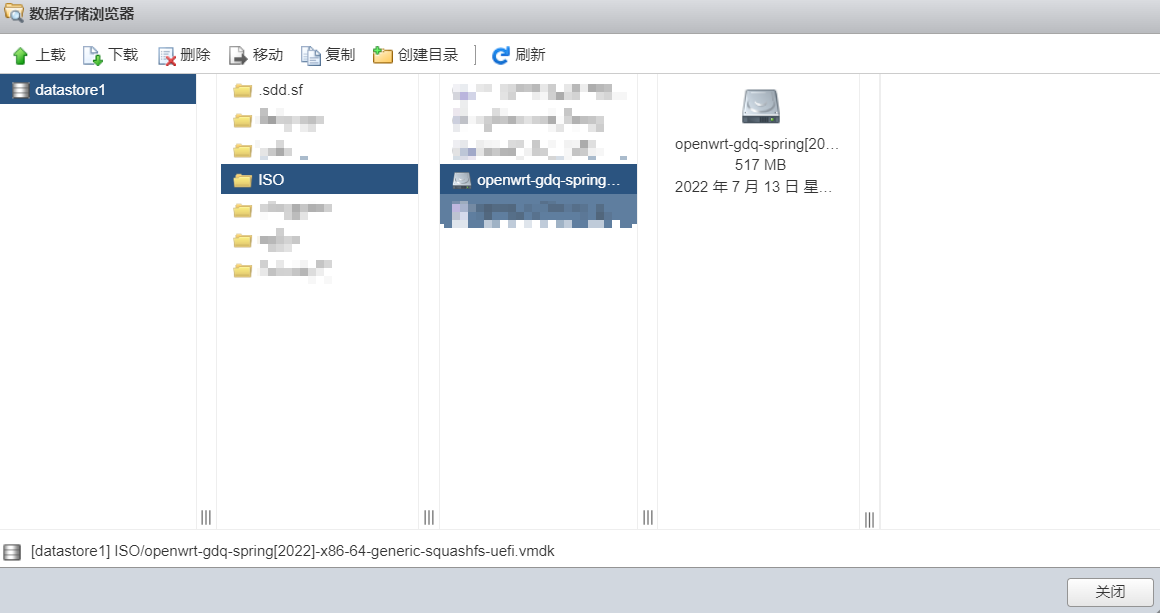 ### 创建虚拟机 话不多说,直接看图 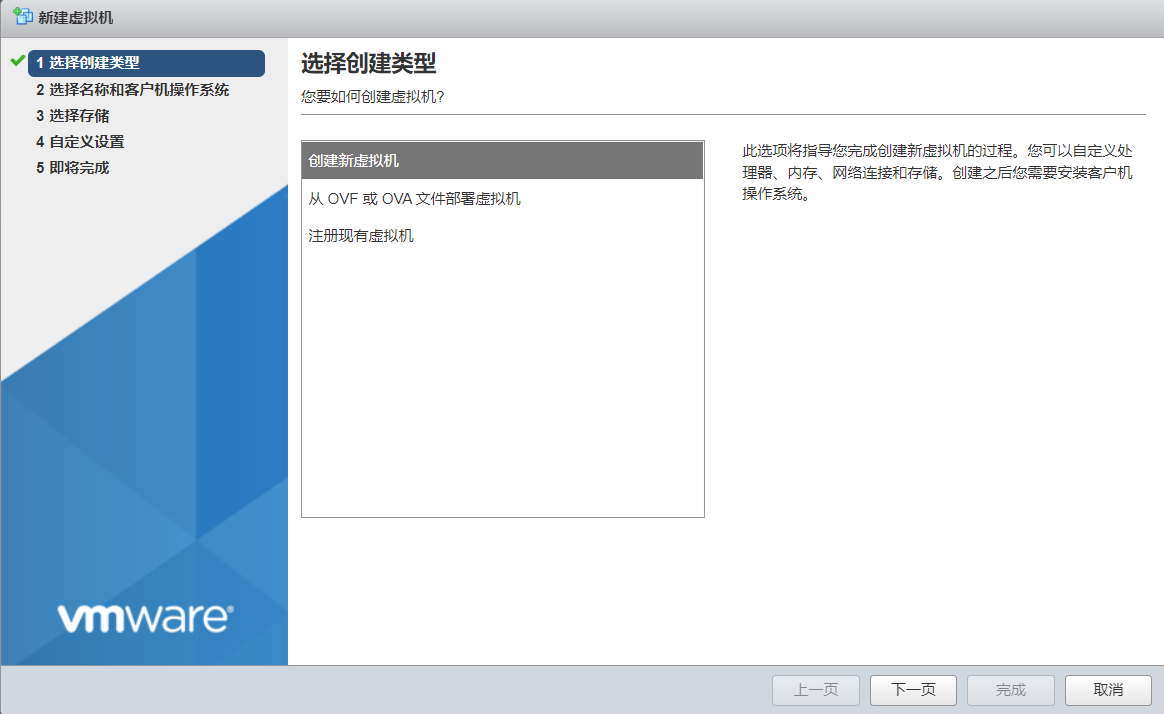 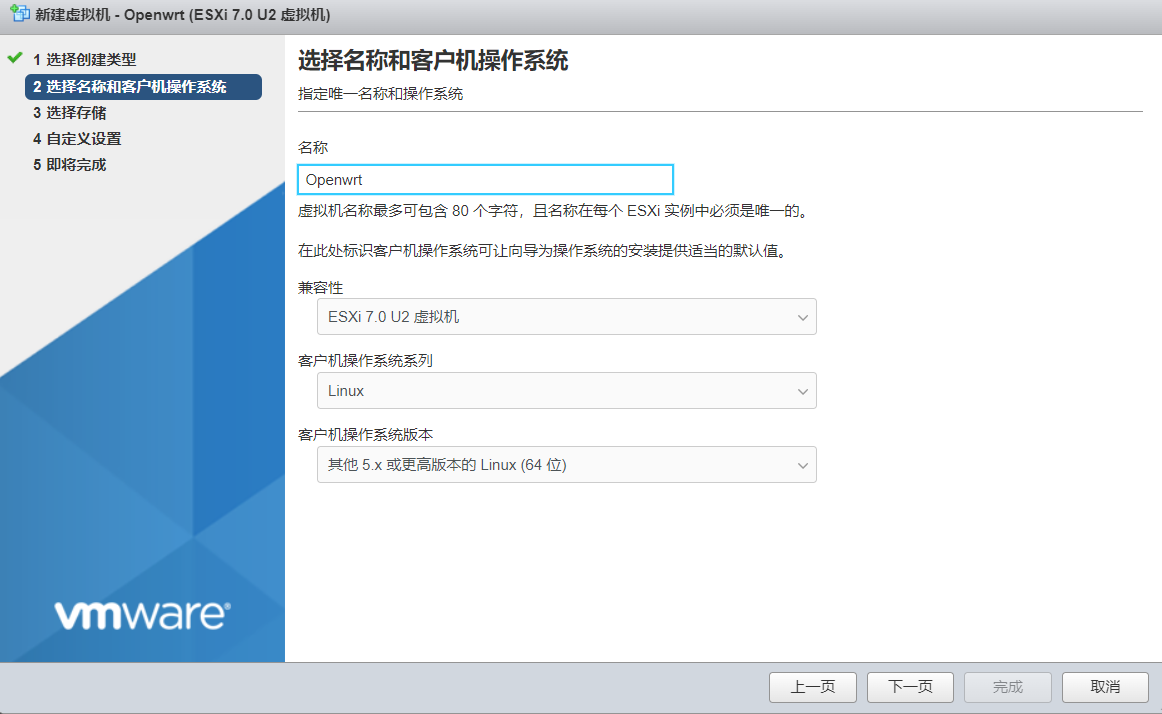 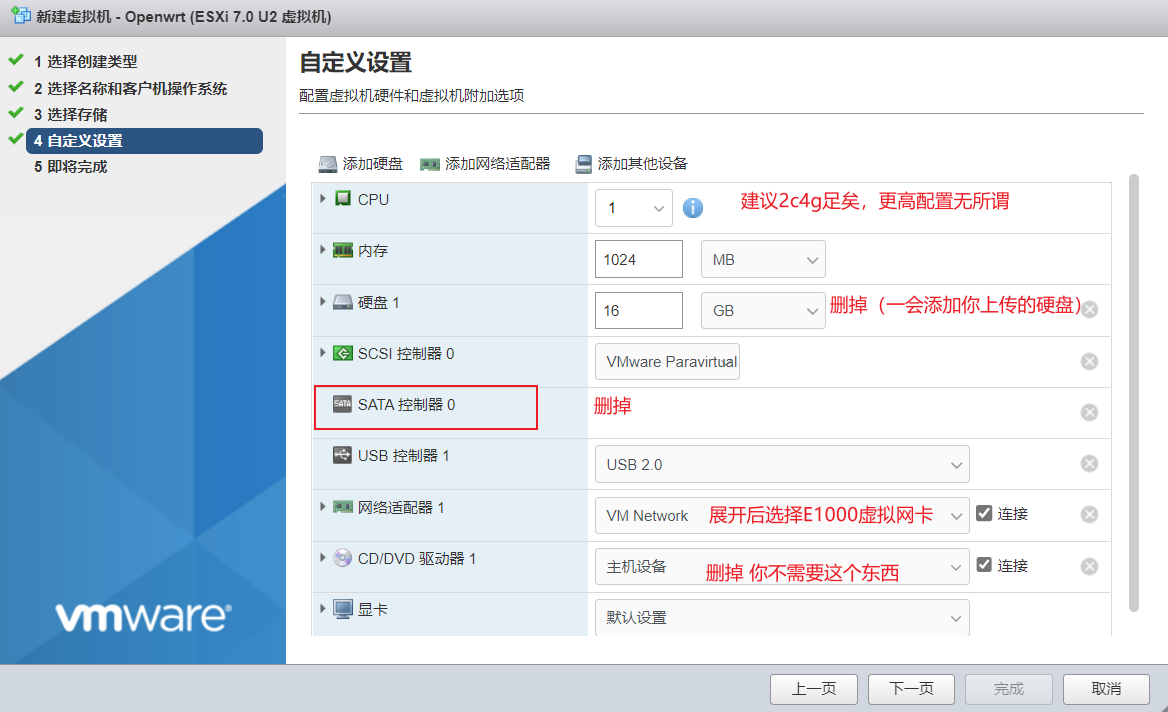 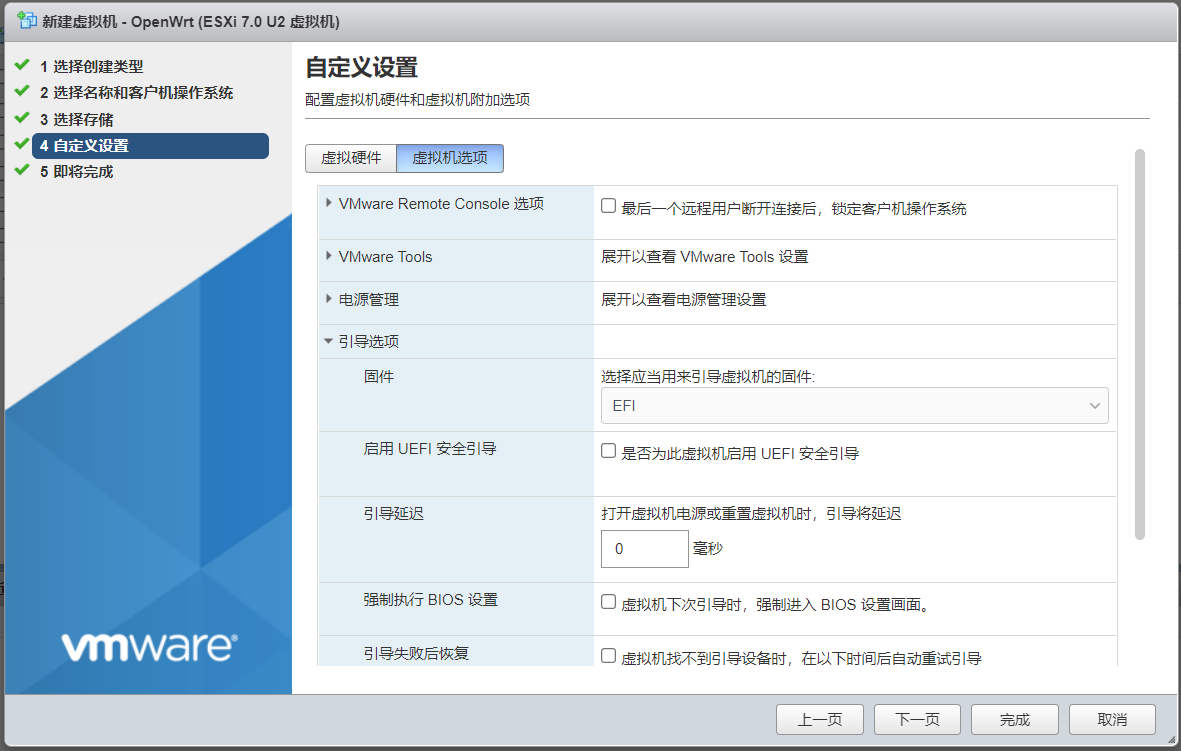  至此,一个新的ESXi虚拟机添加完成,现在让我们来添加OpenWRT的硬盘: 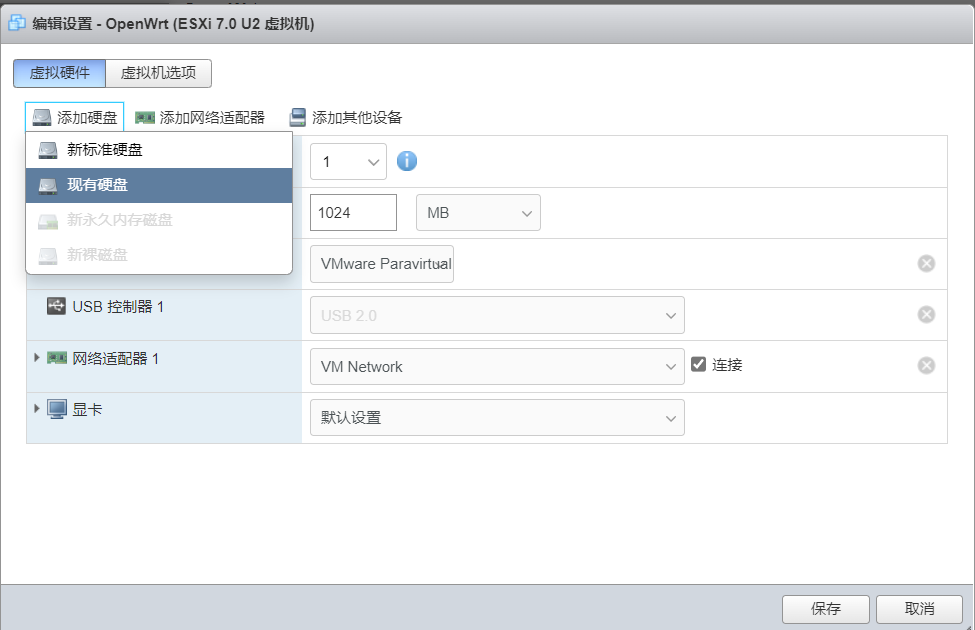 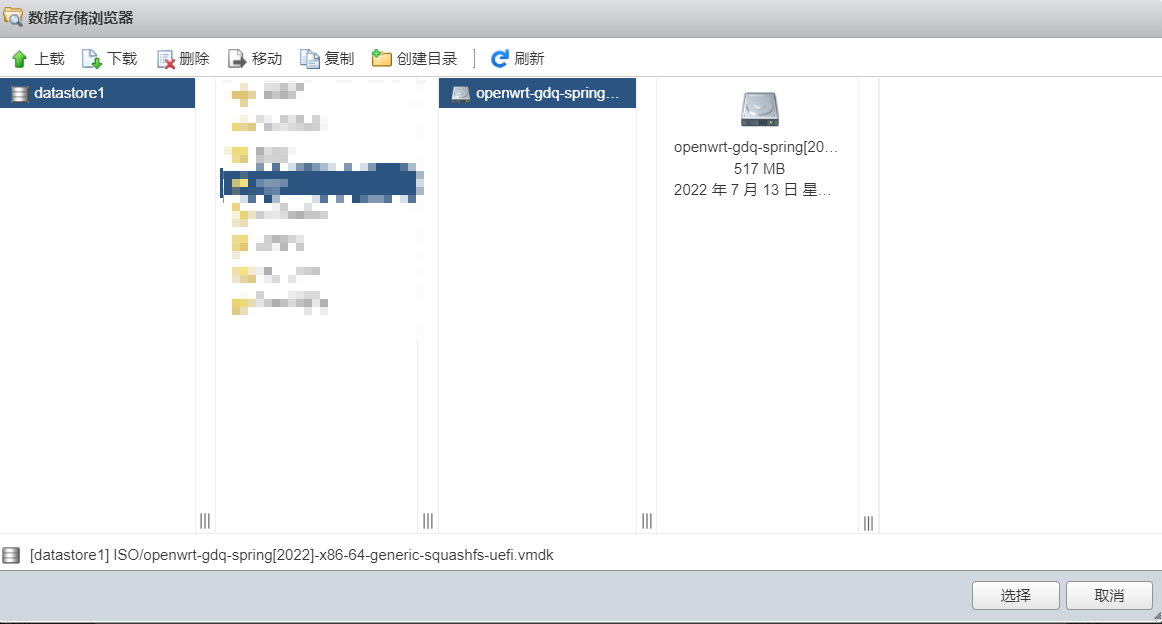 选择好之后,我们会得到如下图的状况: 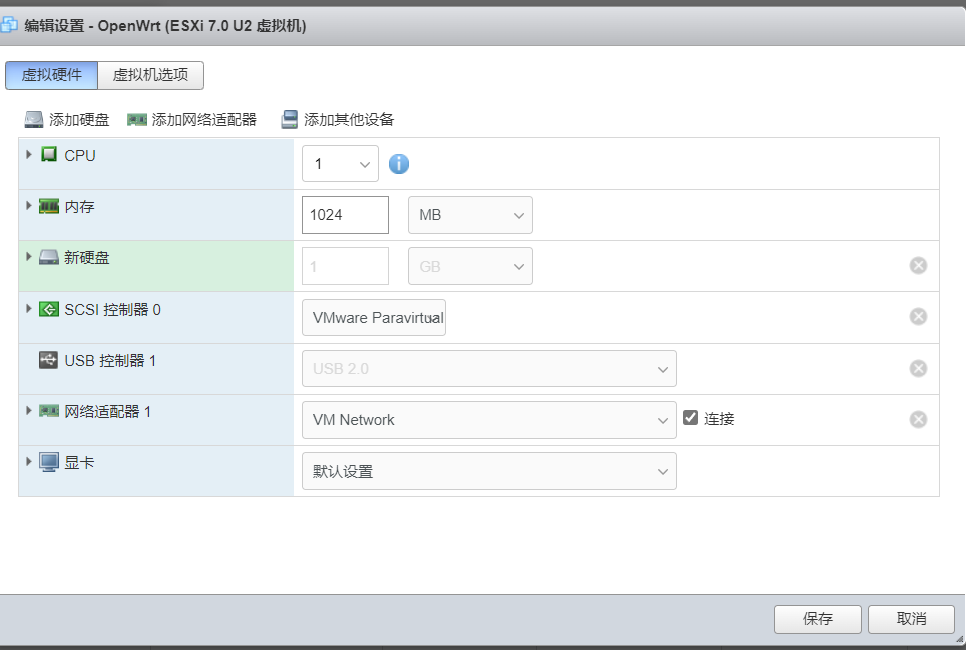 这时候,我们先点击保存(此时还不能开机,我们再次点击编辑配置,更改硬盘大小,我建议20G足矣) 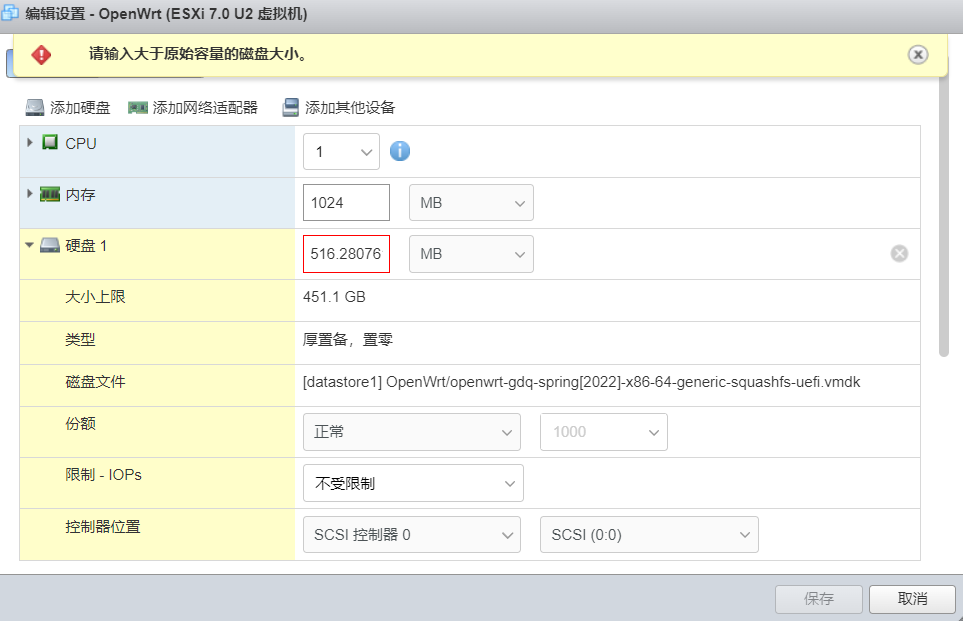 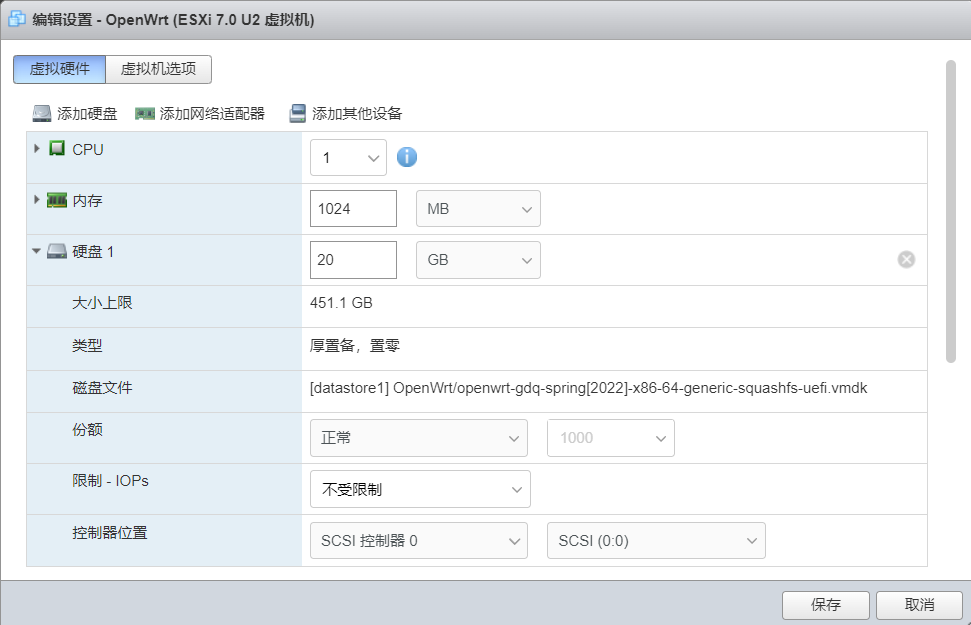 设置完成后,我们继续点击保存,这时候已经可以开机了,现在对它进行一些初步设置:  ``` passwd root #设置一个 root 密码,默认是没有滴 vi /etc/config/network #按“i”键进入编辑模式,将 config interface 'lan'中的option ipaddr '192.168.5.1'更改为你要的内网IP,我这里设置10.0.0.4 ``` 今天就先写到这吧,继续填坑冲冲冲 正文到此结束 本文作者:咕咕 本文链接:https://blog.imgugu.ink/archives/38/ 版权声明:本博客所有文章除特别声明外,均默认采用 CC BY-NC-SA 4.0 许可协议。 最后修改:2022 年 07 月 16 日 © 允许规范转载 打赏 赞赏作者 赞 1 如果觉得我的文章对你有用,请随意赞赏
4 条评论
test测试
hello测试
ESXi growable image选不了把远端设备才可以本地只能pre
是这样,如果你要在本地跑肯定这样弄,但是我这个教程基于ESXI的,还在填坑|´・ω・)ノ